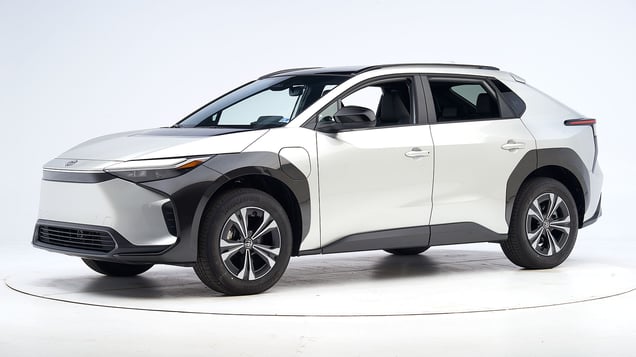
2023 Toyota bZ4X
small SUV / 4-door SUV
Small overlap front: driver-side
Tested vehicle: 2023 Subaru Solterra Touring 4-door 4wd
Rating applies to 2023-25 models
The Subaru Solterra and Toyota bZ4X, both all-new electric vehicles, were introduced for the 2023 model year.
| Evaluation criteria | Rating |
|---|---|
| Overall evaluation | |
| Structure and safety cage | |
| Driver injury measures | |
| Head/neck | |
| Chest | |
| Hip/thigh | |
| Lower leg/foot | |
| Driver restraints and dummy kinematics | |
Technical measurements for this test
Measures of occupant compartment intrusion on driver side
| Evaluation criteria | Measurement |
|---|---|
| Test ID | CEN2301 |
| Lower occupant compartment | |
| Lower hinge pillar max (cm) | 3 |
| Footrest (cm) | 1 |
| Left toepan (cm) | 1 |
| Brake pedal (cm) | 3 |
| Parking brake (cm) | |
| Rocker panel lateral average (cm) | 0 |
| Upper occupant compartment | |
| Steering column | 1 |
| Upper hinge pillar max (cm) | 2 |
| Upper dash (cm) | 3 |
| Lower instrument panel (cm) | 3 |
Driver injury measures
| Evaluation criteria | Measurement |
|---|---|
| Test ID | CEN2301 |
| Head | |
| HIC-15 | 108 |
| Peak gs at hard contact | no contact |
| Neck | |
| Tension (kN) | 1.2 |
| Extension bending moment (Nm) | 19 |
| Maximum Nij | 0.22 |
| Chest maximum compression (mm) | 25 |
| Femur (kN) | |
| Left | 0.6 |
| Right | 0.6 |
| Knee displacement (mm) | |
| Left | 0 |
| Right | 0 |
| Knee-thigh-hip injury risk (%) | |
| Left | 0 |
| Right | 0 |
| Maximum tibia index | |
| Left | 0.29 |
| Right | 0.24 |
| Tibia axial force (kN) | |
| Left | 1.6 |
| Right | 1.9 |
| Foot acceleration (g) | |
| Left | 31 |
| Right | 49 |
Small overlap front: passenger-side
Tested vehicle: 2023 Subaru Solterra Touring 4-door 4wd
Rating applies to 2023-25 models
The Subaru Solterra and Toyota bZ4X, both all-new electric vehicles, were introduced for the 2023 model year. Passenger-side small overlap frontal ratings are assigned by the Institute based on a test of a 2023 Solterra conducted by Subaru.
| Evaluation criteria | Rating |
|---|---|
| Overall evaluation | |
| Structure and safety cage | |
| Passenger injury measures | |
| Head/neck | |
| Chest | |
| Hip/thigh | |
| Lower leg/foot | |
|
Passenger restraints and dummy kinematics
The dummy’s head maintained only partial engagement with the frontal airbag, moving into the gap between the frontal and side curtain airbags and leaving the head vulnerable to contact with forward structure. | |
| Driver injury measures | |
| Head/neck | |
| Chest | |
| Hip/thigh | |
| Lower leg/foot | |
| Driver restraints and dummy kinematics | |
Technical measurements for this test
Measures of occupant compartment intrusion on passenger side
| Evaluation criteria | Measurement |
|---|---|
| Test ID | VTP2302 |
| Lower occupant compartment | |
| Lower hinge pillar max (cm) | 5 |
| Footrest (cm) | 1 |
| Right toepan (cm) | 4 |
| Center toepan (cm) | 1 |
| Rocker panel lateral average (cm) | 0 |
| Upper occupant compartment | |
| Center dash (cm) | 3 |
| Upper hinge pillar max (cm) | 3 |
| Upper dash (cm) | 6 |
| Right lower dash (cm) | 3 |
Passenger injury measures
| Evaluation criteria | Measurement |
|---|---|
| Test ID | VTP2302 |
| Head | |
| HIC-15 | 78 |
| Peak gs at hard contact | no contact |
| Neck | |
| Tension (kN) | 1.0 |
| Extension bending moment (Nm) | 15 |
| Maximum Nij | 0.20 |
| Chest maximum compression (mm) | 21 |
| Femur (kN) | |
| Left | 0.5 |
| Right | 0.5 |
| Knee displacement (mm) | |
| Left | 1 |
| Right | 1 |
| Knee-thigh-hip injury risk (%) | |
| Left | 0 |
| Right | 0 |
| Maximum tibia index | |
| Left | 0.33 |
| Right | 0.35 |
| Tibia axial force (kN) | |
| Left | 1.5 |
| Right | 1.6 |
| Foot acceleration (g) | |
| Left | 30 |
| Right | 32 |
Driver injury measures
| Evaluation criteria | Measurement |
|---|---|
| Test ID | VTP2302 |
| Head | |
| HIC-15 | 88 |
| Peak gs at hard contact | no contact |
| Neck | |
| Tension (kN) | 1.1 |
| Extension bending moment (Nm) | 18 |
| Maximum Nij | 0.18 |
| Chest maximum compression (mm) | 25 |
| Femur (kN) | |
| Left | 0.6 |
| Right | 1.1 |
| Knee displacement (mm) | |
| Left | 0 |
| Right | 1 |
| Knee-thigh-hip injury risk (%) | |
| Left | 0 |
| Right | 0 |
| Maximum tibia index | |
| Left | 0.37 |
| Right | 0.44 |
| Tibia axial force (kN) | |
| Left | 0.7 |
| Right | 1.9 |
| Foot acceleration (g) | |
| Left | 28 |
| Right | 47 |
Moderate overlap front: original test
Tested vehicle: 2023 Subaru Solterra Premium 4-door 4wd
Rating applies to 2023-25 models
The Subaru Solterra and Toyota bZ4X, both all-new electric vehicles, were introduced for the 2023 model year.
| Evaluation criteria | Rating |
|---|---|
| Overall evaluation | |
| Structure and safety cage | |
| Driver injury measures | |
| Head/neck | |
| Chest | |
| Leg/foot, left | |
| Leg/foot, right | |
| Driver restraints and dummy kinematics | |
Technical measurements for this test
Measures of occupant compartment intrusion on driver side
| Evaluation criteria | Measurement |
|---|---|
| Test ID | CEF2301 |
| Footwell intrusion | |
| Footrest (cm) | 6 |
| Left (cm) | 8 |
| Center (cm) | 6 |
| Right (cm) | 5 |
| Brake pedal (cm) | 5 |
| Instrument panel rearward movement | |
| Left (cm) | 0 |
| Right (cm) | 0 |
| Steering column movement | |
| Upward (cm) | 2 |
| Rearward (cm) | 0 |
| A-pillar rearward movement (cm) | 0 |
Driver injury measures
| Evaluation criteria | Measurement |
|---|---|
| Test ID | CEF2301 |
| Head | |
| HIC-15 | 190 |
| Peak gs at hard contact | 23 |
| Neck | |
| Tension (kN) | 1.3 |
| Extension bending moment (Nm) | 15 |
| Maximum Nij | 0.24 |
| Chest maximum compression (mm) | 32 |
| Legs | |
| Femur force - left (kN) | 0.9 |
| Femur force - right (kN) | 2.5 |
| Knee displacement - left (mm) | 0 |
| Knee displacement - right (mm) | 1 |
| Maximum tibia index - left | 0.31 |
| Maximum tibia index - right | 0.55 |
| Tibia axial force - left (kN) | 2.1 |
| Tibia axial force - right (kN) | 4.7 |
| Foot acceleration (g) | |
| Left | 59 |
| Right | 66 |
Side: updated test
Tested vehicle: 2023 Subaru Solterra Touring 4-door 4wd
Rating applies to 2023-25 models built after October 2022
The Subaru Solterra and Toyota bZ4X, both all-new electric vehicles, were introduced for the 2023 model year. Beginning with 2023 models built after October 2022, reinforcements were implemented to improve occupant protection in side impact crashes. (Information about when a specific vehicle was manufactured is on the certification label typically affixed to the driver door or adjacent B-pillar.)
| Evaluation criteria | Rating |
|---|---|
| Overall evaluation | |
| Structure and safety cage | |
| Driver injury measures | |
| Head/neck | |
| Torso | |
| Pelvis | |
| Driver head protection | |
| Rear passenger injury measures | |
| Head/neck | |
| Torso | |
| Pelvis | |
|
Rear passenger head protection
Part of the dummy's head moved beyond the rear portion of the side curtain airbag and contacted the C-pillar. The head protection is inadequate. | |
Technical measurements for this test
Measures of occupant compartment intrusion on driver side
| Evaluation criteria | Measurement |
|---|---|
| Test ID | CES2301 |
| B-pillar to longitudinal centerline of driver's seat (cm) | -27.0 |
| Negative numbers indicate the amount by which the crush stopped short of the seat centerline. | |
Driver injury measures
| Evaluation criteria | Measurement |
|---|---|
| Test ID | CES2301 |
| Head | |
| HIC-15 | 105 |
| Peak gs at hard contact | no contact |
| Neck | |
| Tension (kN) | 0.7 |
| Compression (kN) | 0.1 |
| Shoulder | |
| Lateral deflection (mm) | 13 |
| Lateral force (kN) | 0.6 |
| Torso | |
| Maximum deflection (mm) | 31 |
| Average deflection (mm) | 20 |
| Maximum deflection rate (m/s) | 3.12 |
| Maximum viscous criterion (m/s) | 0.33 |
| Pelvis | |
| Combined force (kN) | 3.9 |
Passenger injury measures
| Evaluation criteria | Measurement |
|---|---|
| Test ID | CES2301 |
| Head | |
| HIC-15 | 212 |
| Peak gs at hard contact | 68 |
| Neck | |
| Tension (kN) | 1.4 |
| Compression (kN) | 0.7 |
| Shoulder | |
| Lateral deflection (mm) | 16 |
| Lateral force (kN) | 1.0 |
| Torso | |
| Maximum deflection (mm) | 30 |
| Average deflection (mm) | 22 |
| Maximum deflection rate (m/s) | 2.79 |
| Maximum viscous criterion (m/s) | 0.35 |
| Pelvis | |
| Combined force (kN) | 2.9 |
Headlights
Ratings are given for 3 different headlight variations available on this vehicle.
(1) Trim level(s): Limited trim
| Evaluation criteria | Rating |
|---|---|
| Low-beam headlight type | LED projector |
| High-beam headlight type | LED projector |
| Curve-adaptive? | No |
| High-beam assist? | Yes |
|
Overall rating | |
| Distance at which headlights provide at least 5 lux illumination: | |
Low beams
On the straightaway, visibility was good on the left side of the road and fair on the right side. On curves, visibility was good on the gradual left and both right curves and fair on the sharp left curve.
The low beams never exceeded glare limits.
High beams
On the straightaway, visibility was good on both sides of the road. On curves, visibility was good on both right curves and fair on both left curves.
High-beam assist compensates for some limitations of this vehicle's low beams on the straightaway, on both left curves and on the sharp right curve.
Technical measurements for this test
| Evaluation criteria | Measurement |
|---|---|
| Trim level(s) |
|
| Low-beam headlight type | LED projector |
| High-beam headlight type | LED projector |
| Curve-adaptive? | No |
| High-beam assist? | Yes |
|
Overall rating Applies to 2023-25 models |
| LOW BEAMS | Average minimum useful illumination distance (5 lux) |
Amount glare exceeded threshold |
|---|---|---|
| Straightaway right edge | 92.2 m | None |
| Straightaway left edge | 61.6 m | None |
| 250m radius right curve, right edge | 71.3 m | None |
| 250m radius left curve, left edge | 65.2 m | None |
| 150m radius right curve, right edge | 58.0 m | None |
| 150m radius left curve, left edge | 50.9 m | None |
| HIGH BEAMS | Average minimum useful illumination distance (5 lux) |
|---|---|
| Straightaway right edge | 176.2 m |
| Straightaway left edge | 162.4 m |
| 250m radius right curve, right edge | 82.5 m |
| 250m radius left curve, left edge | 72.1 m |
| 150m radius right curve, right edge | 66.4 m |
| 150m radius left curve, left edge | 60.2 m |
(2) Trim level(s): XLE trim; built after July 2023
| Evaluation criteria | Rating |
|---|---|
| Low-beam headlight type | LED projector |
| High-beam headlight type | LED projector |
| Curve-adaptive? | No |
| High-beam assist? | Yes |
|
Overall rating | |
| Distance at which headlights provide at least 5 lux illumination: | |
Low beams
On the straightaway, visibility was inadequate on both sides of the road. On curves, visibility was fair on both right curves and inadequate on both left curves.
The low beams never exceeded glare limits.
High beams
On the straightaway, visibility was inadequate on both sides of the road. On curves, visibility was good on the gradual right and gradual left curves and fair on the sharp right and sharp left curves.
High-beam assist compensates for some limitations of this vehicle's low beams on the straightaway and all 4 curves.
Technical measurements for this test
| Evaluation criteria | Measurement |
|---|---|
| Trim level(s) |
|
| Low-beam headlight type | LED projector |
| High-beam headlight type | LED projector |
| Curve-adaptive? | No |
| High-beam assist? | Yes |
|
Overall rating Applies to 2023-25 models built after July 2023 |
| LOW BEAMS | Average minimum useful illumination distance (5 lux) |
Amount glare exceeded threshold |
|---|---|---|
| Straightaway right edge | 58.1 m | None |
| Straightaway left edge | 43.8 m | None |
| 250m radius right curve, left edge | 55.1 m | None |
| 250m radius left curve, left edge | 46.9 m | None |
| 150m radius right curve, right edge | 50.4 m | None |
| 150m radius left curve, left edge | 40.9 m | None |
| HIGH BEAMS | Average minimum useful illumination distance (5 lux) |
|---|---|
| Straightaway right edge | 123.3 m |
| Straightaway left edge | 119.5 m |
| 250m radius right curve, right edge | 80.1 m |
| 250m radius left curve, left edge | 75.7 m |
| 150m radius right curve, right edge | 61.2 m |
| 150m radius left curve, left edge | 59.9 m |
(3) Trim level(s): XLE trim; built before August 2023
| Evaluation criteria | Rating |
|---|---|
| Low-beam headlight type | LED projector |
| High-beam headlight type | LED projector |
| Curve-adaptive? | No |
| High-beam assist? | Yes |
|
Overall rating | |
| Distance at which headlights provide at least 5 lux illumination: | |
Low beams
On the straightaway, visibility was inadequate on both sides of the road. On curves, visibility was fair on the sharp right curve and inadequate on the gradual right and both left curves.
The low beams never exceeded glare limits.
High beams
On the straightaway, visibility was inadequate on both sides of the road. On curves, visibility was good on the gradual right and gradual left curves and fair on the sharp right and sharp left curves.
High-beam assist compensates for some limitations of this vehicle's low beams on the straightaway and all 4 curves.
Technical measurements for this test
| Evaluation criteria | Measurement |
|---|---|
| Trim level(s) |
|
| Low-beam headlight type | LED projector |
| High-beam headlight type | LED projector |
| Curve-adaptive? | No |
| High-beam assist? | Yes |
|
Overall rating Applies to 2023 models built before August 2023 |
| LOW BEAMS | Average minimum useful illumination distance (5 lux) |
Amount glare exceeded threshold |
|---|---|---|
| Straightaway right edge | 51.1 m | None |
| Straightaway left edge | 36.9 m | None |
| 250m radius right curve, left edge | 46.9 m | None |
| 250m radius left curve, left edge | 42.9 m | None |
| 150m radius right curve, right edge | 51.0 m | None |
| 150m radius left curve, left edge | 38.2 m | None |
| HIGH BEAMS | Average minimum useful illumination distance (5 lux) |
|---|---|
| Straightaway right edge | 121.9 m |
| Straightaway left edge | 117.9 m |
| 250m radius right curve, right edge | 82.3 m |
| 250m radius left curve, left edge | 78.0 m |
| 150m radius right curve, right edge | 62.0 m |
| 150m radius left curve, left edge | 60.2 m |